The 1966 Chevrolet Chevelle SS AMT Model is a detailed 1:25 scale kit, offering enthusiasts a chance to craft a classic American muscle car. With intricate parts and a downloadable PDF guide, it’s a must-have for modelers seeking precision and authenticity. The kit captures the iconic design of the 1966 Chevelle SS, making it a sought-after project for both beginners and experienced builders.
Overview of the AMT 1966 Chevrolet Chevelle SS Model Kit
The AMT 1966 Chevrolet Chevelle SS Model Kit is a 1:25 scale reproduction of the iconic muscle car, offering a detailed and authentic building experience. Designed for both novice and experienced modelers, the kit includes over 100 parts, capturing the essence of the original vehicle. It features options like a big-block 396 engine, clear headlights, and chrome trim, allowing for a factory-fresh finish. The kit also provides two steering wheel choices, adding customization options. A downloadable PDF instruction manual is available, ensuring a smooth assembly process with step-by-step guidance. This rebox release from 2022 includes detailed diagrams and exploded views, making it a must-have for enthusiasts of classic American automobiles.
Importance of Following the Instructions
Following the instructions for the 1966 Chevrolet Chevelle SS AMT Model is crucial for achieving an accurate and professional finish. The provided PDF guide includes detailed step-by-step directions, diagrams, and exploded views to ensure every part is correctly assembled. Misaligned components or paint errors can ruin the model’s appearance, but adhering to the instructions minimizes these risks. The manual also highlights specific assembly areas, such as engine and frame construction, to maintain authenticity. By carefully following the instructions, modelers can avoid common pitfalls and achieve a precise, factory-fresh representation of the iconic Chevelle SS. This attention to detail ensures a rewarding and successful building experience for both beginners and experienced modelers.
Historical Background of the 1966 Chevrolet Chevelle SS
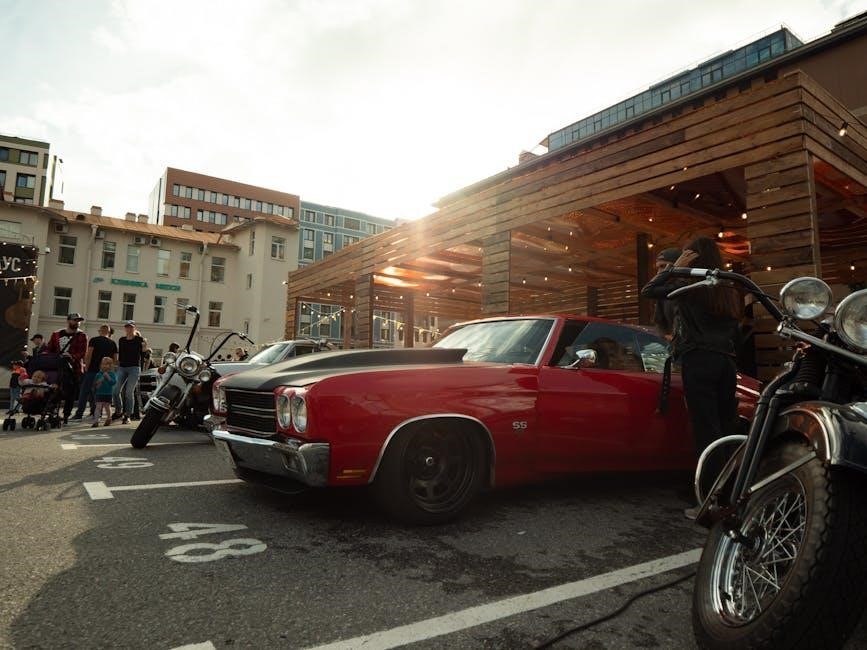
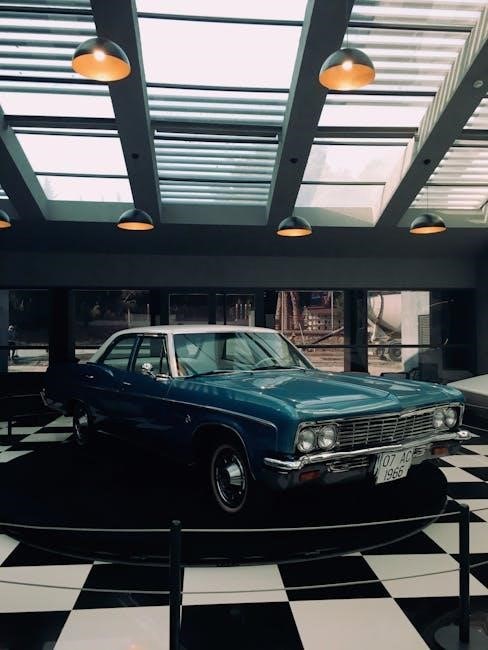
The 1966 Chevrolet Chevelle SS represents a pinnacle in American muscle car history, introduced during a golden era of automotive performance. Its powerful 396 V8 engine and aggressive styling made it a symbol of speed and style, captivating car enthusiasts nationwide. The SS 396 package, introduced in 1966, solidified the Chevelle’s reputation as a formidable competitor in the muscle car market, blending power with elegance to become an iconic classic.
The Evolution of the Chevelle SS
The Chevrolet Chevelle SS evolved significantly over its production years, with the 1966 model marking a high point in performance and style. Introduced in 1964 as a mid-size car, the Chevelle quickly gained popularity for its balance of power and affordability. By 1965, the SS (Super Sport) package became a standalone model, offering enhanced engines and sporty aesthetics. The 1966 iteration debuted the SS 396, featuring a powerful 396 cubic-inch V8 engine, solidifying its status as a true muscle car. This era saw refinements in design, including cleaner lines and aggressive styling, while maintaining the raw power that defined the SS legacy. The Chevelle SS became a symbol of American automotive excellence, embodying the spirit of the muscle car era with its blend of performance and elegance.
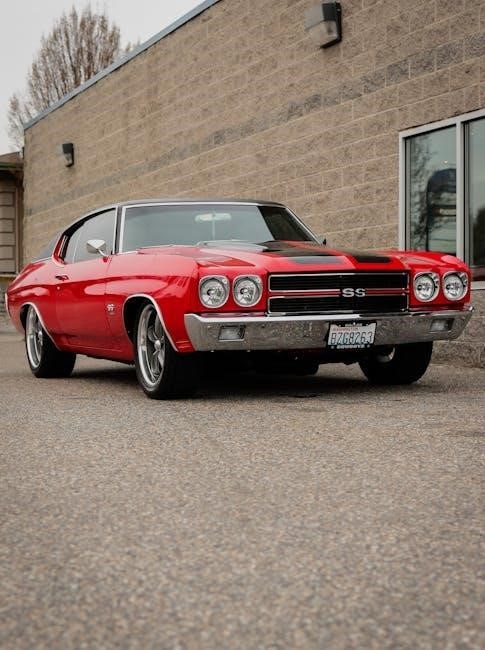
Key Features of the 1966 Model
The 1966 Chevrolet Chevelle SS boasted several standout features that set it apart from its predecessors. The most notable was the introduction of the SS 396 package, which included a powerful 396 cubic-inch V8 engine, delivering exceptional performance. The model also featured distinctive styling elements such as a bold front grille, chrome accents, and sporty wheel covers. Inside, the SS offered a refined interior with bucket seats, a console, and a dash-mounted tachometer for a race-inspired feel. The 1966 Chevelle SS also had improved suspension and braking systems, enhancing its handling and responsiveness. These features combined to make the 1966 Chevelle SS a formidable presence on both the road and the track, embodying the essence of the muscle car era.
Understanding the AMT Model Kit
The AMT 1966 Chevrolet Chevelle SS is a 1:25 scale model kit with over 100 detailed parts, including a big-block 396 engine and chrome trim. The kit offers clear headlights and two steering wheel options, capturing the essence of the iconic muscle car. A downloadable PDF guide is available, providing step-by-step instructions for assembly. This kit is ideal for both beginners and experienced modelers, ensuring a precise and authentic build of the 1966 Chevelle SS.
Scale and Details of the 1:25 Model
The AMT 1966 Chevrolet Chevelle SS is offered in a 1:25 scale, providing a detailed representation of the iconic muscle car. The kit includes over 100 intricately designed parts, capturing the essence of the original vehicle. Key features such as the big-block 396 engine, chrome trim, and clear headlights are meticulously recreated. The model also offers two steering wheel options, adding to its authenticity. The 1:25 scale ensures that even the smallest details, like the engine compartment and interior, are accurately depicted. This level of precision makes the kit appealing to both experienced modelers and newcomers. The downloadable PDF guide further enhances the building experience by providing clear, step-by-step instructions for assembly.
Components and Parts Included
The AMT 1966 Chevrolet Chevelle SS model kit includes a comprehensive set of parts, ensuring an authentic and detailed build. With over 100 components, the kit features a range of intricate pieces, such as the big-block 396 engine, chrome trim, and clear headlights. The interior details, including the dashboard and seating, are also meticulously recreated. Additionally, the kit provides two steering wheel options, allowing for customization. All parts are precision-molded to ensure accuracy and fit. The included PDF guide offers a detailed inventory list and assembly instructions, making it easier to organize and identify each component. This extensive array of parts and accessories ensures a rewarding and precise building experience for modelers of all skill levels.
Preparing for Assembly
Preparing for assembly involves gathering essential tools, organizing parts, and consulting the downloadable PDF guide. Ensure all components are accounted for and instructions are followed carefully to ensure accuracy and a smooth build process.
Necessary Tools and Materials
To successfully assemble the 1966 Chevrolet Chevelle SS AMT Model, you’ll need a set of essential tools and materials. Start with a good pair of plastic cutters or sprue clippers to remove parts from the sprue. Sanding tools, such as fine-grit sandpaper and a sanding block, are crucial for smoothing rough edges. A hobby knife or X-Acto knife will help with precise trimming. Additional tools include files, tweezers, and a small paintbrush for applying adhesives. For painting, ensure you have acrylic paints, primer, and a paintbrush set. A clean, well-lit workspace with a cutting mat or old newspapers will protect your surfaces. Lastly, keep a tube of plastic cement and a hobby adhesive on hand for secure bonding.
Optional materials include a paint palette, rags, and water for thinning paints. A reference guide or downloaded PDF instructions will also be invaluable for guidance. Safety gear like gloves and safety glasses is recommended when cutting or sanding. For added customization, consider decal sets or metal detailing parts. Proper preparation ensures a flawless and professional finish for your model.
Workshop Setup and Safety Precautions
Setting up a well-organized and safe workspace is crucial for assembling the 1966 Chevrolet Chevelle SS AMT Model. Begin by creating a clean, well-lit, and well-ventilated area to minimize dust and fumes. Cover your work surface with a cutting mat or old newspapers to protect it from damage. Gather all necessary tools and materials within easy reach to avoid distractions during assembly. Always wear safety gear, such as gloves and safety glasses, when handling sharp objects or chemicals. Ensure good ventilation, especially when painting or using adhesives, to prevent inhaling harmful fumes. Keep flammable materials away from heat sources and have a small fire extinguisher nearby. A first aid kit should also be within easy access in case of accidents. Regularly clean your workspace to prevent clutter and potential hazards. By prioritizing safety and organization, you’ll enjoy a smoother and more enjoyable building experience. For additional tips, refer to the PDF instructions provided with the kit.
Step-by-Step Assembly Process
Begin with unboxing and inventory, then follow the guide for frame assembly, body installation, and final touches. Refer to the PDF instructions for detailed steps.
Unboxing and Inventory of Parts
Start by carefully unboxing the 1966 Chevrolet Chevelle SS AMT model kit and organizing its contents. Ensure all components, including plastic parts, decals, and hardware, are accounted for by cross-referencing the PDF instructions. Test-fit each part before gluing to avoid mismatches. Use the provided inventory list to verify the completeness of your kit. Pay special attention to small details like chrome trim and decals, as these are crucial for an authentic finish. If any parts are missing or mislabeled, consult the official AMT instructions or contact customer support. Proper organization and inventory ensure a smooth assembly process.
Initial Preparation and Priming
Begin by lightly sanding all plastic parts to ensure smooth surfaces and proper fitment. This step removes mold lines and imperfections, enhancing paint adhesion. Clean the parts thoroughly with a mild detergent to eliminate grease and dust. Once dry, apply a high-quality primer specifically designed for plastics. Follow the instructions on the primer for optimal drying times. For best results, prime in a well-ventilated area, using a primer color that matches your desired paint scheme. Allow the primer to cure completely before proceeding. Proper preparation ensures a flawless base coat and a professional-looking finish. This step is essential for achieving a factory-fresh appearance on your 1966 Chevelle SS model.
Building the Frame and Engine
Start by constructing the frame using the provided chassis parts. Align and glue the front and rear suspension components, ensuring proper fitment. Next, focus on the engine assembly. The 396 cubic-inch V8 engine is a key feature of the 1966 Chevelle SS. Carefully attach the engine block, cylinder heads, and intake manifold. Use a small amount of glue to secure the engine to the chassis. Install the transmission and driveshaft, following the instruction diagrams for accurate placement. Paint engine components like the valve covers and air filter before assembly for a realistic look. Finally, attach the exhaust system and fuel tank to complete the undercarriage. Allow all glued parts to dry completely before moving on to the next step.
Assembling the Body and Exterior Components
Begin by carefully aligning and gluing the main body panels, including the hood, trunk lid, and doors. Ensure proper fitment to avoid gaps or misalignment. Next, attach the front and rear bumpers, making sure they are securely fastened with small amounts of glue. Install the chrome trim and emblems, following the kit’s diagram for accurate placement. For added realism, attach the side mirrors and windshield, handling them gently to prevent breakage. Finally, secure the exterior lighting components, such as headlights and taillights, to complete the body assembly. Allow all glued parts to dry before proceeding to the next step.
Installing the Interior and Dashboard
Start by assembling the dashboard components, including the instrument cluster, steering wheel, and gearshift. Paint and detail these parts before installation for a realistic finish. Next, carefully fit the dashboard into the interior compartment, ensuring proper alignment with the pre-molded dash mounts. Install the seat assemblies by gluing them to the floor pan, following the kit’s instructions for correct positioning. Add the door panels, making sure they align with the door frames. Finally, place the carpeting or floor mat, securing it with a small amount of glue. Allow all parts to dry completely before moving on to the exterior components.
Attaching Wheels and Suspension
Begin by preparing the axles and suspension components according to the instructions. Paint and detail the suspension parts before installation for added realism. Attach the front and rear axles to the frame, ensuring they are properly aligned and secured. Next, install the wheels, making sure they fit snugly onto the axle hubs. Use the provided screws or pins to secure them firmly. Check the alignment of the wheels to ensure they are straight and evenly spaced. Finally, attach any additional suspension details, such as springs or shock absorbers, following the kit’s guidance. Allow the glue to dry completely before handling the model further.
Final Assembly and Quality Check
Once all major components are built, carefully assemble the chassis, body, and interior together. Ensure all parts align properly and fit seamlessly. Double-check the instructions to confirm no steps were missed. Perform a thorough inspection of the entire model, verifying that all details, such as decals and emblems, are correctly placed. Check for any paint imperfections or smudges and address them promptly. Use a soft cloth to wipe away dust or fingerprints. Finally, conduct a last-minute alignment check of the wheels and suspension to ensure proper stance. Once satisfied, your 1966 Chevrolet Chevelle SS AMT model is complete and ready for display.
Expert Tips for a Professional Finish
For a polished look, apply a clear coat after painting to protect the finish and enhance color depth. Use a fine-grit sanding pad to smooth out small imperfections before priming. When assembling delicate parts, employ a pair of tweezers to avoid damaging components. Test-fit all parts before gluing to ensure proper alignment. To achieve a realistic engine, paint individual components separately and then assemble them. For added authenticity, weather the model slightly with washes or chalk. Avoid over-tightening screws, as this can warp plastic parts. Finally, display your model on a sturdy base to showcase your hard work. These techniques will elevate your 1966 Chevelle SS AMT model to a professional level.
Painting and Customization
Use high-quality acrylic paints for a vibrant finish. Apply thin coats, allowing each layer to dry before adding additional details. Consider weathering techniques for a realistic, aged look. Clear coats protect the paint and enhance color depth. For customization, explore period-correct decals or unique designs to personalize your model. Sand surfaces smooth before painting to ensure proper adhesion and a professional finish. These steps will help you achieve a stunning, customized 1966 Chevelle SS model.
Recommended Paint Schemes and Techniques
For the 1966 Chevrolet Chevelle SS AMT model, consider using classic color schemes like GM’s iconic red, black, or white, which reflect the era’s popular finishes. Apply a primer coat to ensure smooth paint adhesion and even coverage. Use high-quality acrylic paints, thinning them slightly for better flow. Airbrushing is recommended for large surfaces, while small details can be hand-painted with precision brushes. Clear coats protect the paint and enhance gloss. Weathering techniques, such as light dusting or washes, can add realism. Refer to the official PDF guide for precise color codes and application tips. These methods will help achieve a professional and authentic finish for your model.
Adding Decals and Final Touches
Once the paint is fully cured, apply the decals provided in the kit, ensuring proper alignment and placement as per the PDF guide. Use a micro-scale solution to secure them firmly. After decals, apply a clear coat to seal and protect them. For final touches, inspect the model for any small imperfections and touch them up. Add chrome or metal finishes to enhance details like trim, wheels, or emblems. Lightly weather the model with washes or subtle dust effects for realism. Allow all components to dry completely before handling. These steps ensure a polished and professional finish, bringing your 1966 Chevelle SS model to life with precision and authenticity.
Troubleshooting Common Issues
Common issues include misaligned parts and paint smudges. Use files to adjust parts and test-fit before gluing. For smudges, wait until paint dries, then lightly sand and repaint affected areas.
Dealing with Misaligned Parts
Misaligned parts can be a frustrating issue during assembly. To address this, use a hobby file or sandpaper to gently adjust the edges of the parts for a better fit. Always test-fit components before applying glue to ensure proper alignment. If a part is slightly warped, try soaking it in warm water to reshape it. For minor gaps, plastic cement can be used to fill in the spaces. Refer to the PDF instructions for guidance on part placement and alignment. Patience is key, as small adjustments can make a significant difference in the final appearance of your model. Proper alignment ensures a seamless and professional-looking build.
Fixing Paint Mistakes and Smudges
Paint mistakes and smudges can be corrected with careful techniques. If paint is still wet, use a clean brush or cloth to blot the error. For dried paint, lightly sand the area with fine-grit sandpaper and repaint. Smudges can be removed with a damp cloth or touch-up paint. To prevent mistakes, apply paint in thin coats and allow proper drying time. Use masking tape for sharp edges and details. For small blemishes, a toothpick or fine brush can carefully remove excess paint. Refer to the PDF instructions for recommended paint schemes and techniques. Patience and attention to detail will ensure a flawless finish for your model. Always test paint on a spare part before applying it to the main assembly.
Additional Resources and References
Download the official AMT 1966 Chevrolet Chevelle SS PDF instructions for detailed assembly guides and diagrams. Additional resources include factory restoration manuals and online modeler forums for tips and support.
Downloading the Official AMT Instructions PDF
Downloading the official AMT instructions PDF for the 1966 Chevrolet Chevelle SS model is a convenient way to access detailed assembly guides. The PDF provides step-by-step instructions, diagrams, and exploded views to help modelers accurately build the 1:25 scale kit. It includes information on parts identification, assembly sequences, and painting tips. The guide is officially licensed by GM, ensuring authenticity and precision. Additionally, the PDF can be easily stored on digital devices for quick reference during the building process. For enthusiasts, this resource is indispensable, offering clarity and confidence in creating a faithful replica of the iconic muscle car. The PDF is available for free download from various online sources, making it accessible to all modelers.
Factory Assembly Manuals and Restoration Guides
Factory assembly manuals and restoration guides for the 1966 Chevrolet Chevelle SS provide comprehensive details for enthusiasts. These resources include original GM-licensed materials, such as the 1964-1966 Chevelle Factory Assembly Manual, which offers page-by-page reproductions of the service manual used by Chevrolet mechanics. The guides feature step-by-step instructions, clear images, exploded view illustrations, and specifications, ensuring authenticity. Restoration guides like Paul A. Herd’s book offer detailed insights into engines, frames, suspension, and interiors, with over 350 photos and diagrams. These manuals are essential for modelers aiming to replicate the original vehicle accurately. They are available in various formats, including PDF downloads, making them accessible for both model building and full-scale restorations.
Online Communities and Forums for Modelers
Online communities and forums are invaluable resources for modelers working on the 1966 Chevrolet Chevelle SS AMT Model. Platforms like Scalemates and dedicated modeling forums offer extensive discussions, reviews, and tips from experienced builders. Enthusiasts share their progress, solutions to common issues, and creative customization ideas. These communities also provide access to rare documentation, including PDF instructions and assembly guides. Additionally, forums often feature galleries showcasing finished models, inspiring builders to achieve professional results. Whether troubleshooting parts or seeking advice on painting, these online spaces foster collaboration and knowledge sharing, helping modelers of all skill levels bring their 1966 Chevelle SS projects to life with precision and authenticity.
Completing the 1966 Chevrolet Chevelle SS AMT Model is a rewarding experience, offering a sense of accomplishment and pride in crafting a detailed replica of this iconic car.
Final Thoughts on Building the 1966 Chevelle SS Model
Building the 1966 Chevrolet Chevelle SS AMT Model is a rewarding journey that combines precision and creativity. The detailed instructions provided in the PDF guide ensure that each step is clear, allowing modelers to achieve an authentic and accurate representation of this iconic muscle car. The kit’s 1:25 scale captures the essence of the original vehicle, from its powerful engine to its sleek exterior. By following the step-by-step instructions and utilizing the included parts, enthusiasts can create a stunning display piece that reflects their passion for classic automotive design. This project is a testament to the enduring appeal of the Chevelle SS and the joy of model building.
Encouragement for Beginners and Experienced Modelers
Whether you’re a seasoned modeler or a beginner, the 1966 Chevrolet Chevelle SS AMT Model offers an engaging and fulfilling experience. The detailed PDF instructions provide a clear roadmap, making it accessible to all skill levels. For beginners, the kit is an excellent introduction to the world of model building, teaching essential techniques like painting, assembly, and detailing. Experienced modelers will appreciate the intricate components and the opportunity to add personal touches for a unique finish. The sense of accomplishment upon completion is immense, making this project a delightful endeavor for everyone. Embrace the challenge and enjoy the creative process of bringing this classic car to life in miniature form.